Showing posts with label Paper Crafts. Show all posts

Thursday, 13 September 2012

DIY: Heart Wall Decor

Here's really simple craft piece I did for my wall! :)

What You'll Need:
  1. Dark and light Pink color papers
  2. Card stock paper
  3. Gold Paint
  4. Scissors, Glue and a Pencil
Steps:
  1. Fold a piece of card stock paper in half.
 2. Draw one side of a heart on the folded card stock paper.
 3. Cut it.
 4. Fold the Pink paper into equal parts. Cut it into halves, so you'll have 2 folded pieces of pink papers.
5. Fold the paper into a second half.
 6. Use the previously cut out heart to trace a heart on the folded pink paper.

 7. Cut out the hearts. Unfold the paper. Cut the papers at the division.


8. Repeat all the above steps with the dark pink paper. Stick the cut pink papers on a card stock paper or chart paper.
9. Paint some of the hearts with gold paint. Let it dry.

10.Last step, Stick it on your wall.

Good Day!
San

Friday, 24 August 2012

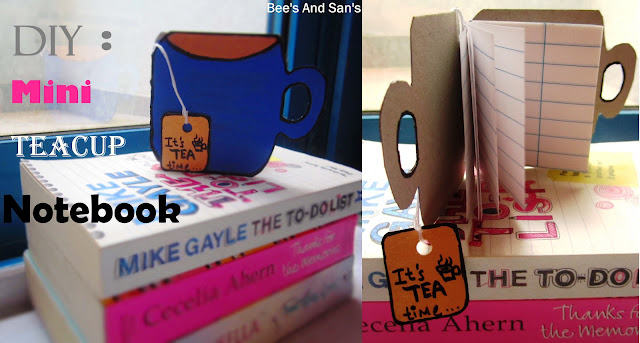
DIY: Mini Teacup Notebook


My Dad is a Tea lover and he will drink tea, even its offered to him at midnight! :D
So, I made this mini teacup shaped notebook for him!

What You'll Need:

 Steps:
1. Measure 12cm width and 6.4cm height on the paper. Cut it.
 I've cut only 7 sheets of Paper.
 2. Fold the papers in half.
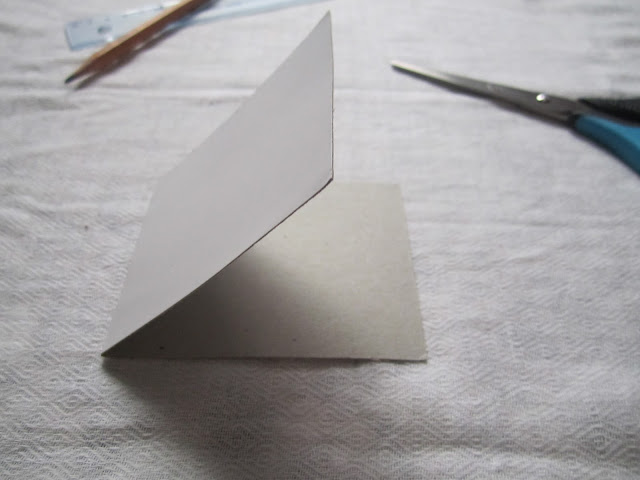
 3. Measure the Cardboard Paper 18.5 cm in width and 7.4 cm in height. Cut it.
 4. Fold it in half.
5. Position the papers on the Cardboard paper using paper clips. I couldn't find any paper clips so I used Bobby pins! :D

6. Staple the papers onto the Cardboard paper. Make sure the staple pin's pointy ends fold in the inside.
 7. Draw a Cup with curvy edges on the notebook.
     My Bobby pins have left black marks on my book but that'll be gone when we paint over it.
8. Use a craft knife to cut a hole through the cup's handle. If you use enough pressure on the front cover of the book, it'll leave a print on the back cover. This will make it easy to cut a hole on the back cover.

9.Cut out the remaining unwanted portion of the book.
10. Outline the cup with a black marker. 
11. Paint it. I've used Acrylic paint. Let it Dry.
12. Outline the cup again if you've over painted over the previous outline.
( Midway through, I changed the cup's colour to a lighter blue :P )
Next, I'm making a 'Tea tag'  bookmark for the notebook. 
You'll need:
13. Paint the rounded square cardboard. Let it dry.
14. Punch a hole in it.
15. Write a little message at the front and back of the Tea Tag.


16. Measure and Cut a string of Embroidery thread.
 17. Apply glue on the inner joint of the back cover. Place the embroidery thread over it. Let it Dry.
 18. Tie the Tea tag at the other end of the embroidery string.
 19. Apply one more coat of glue on the String at the inner joint. Let it Dry.
And here's the Tea Cup!


Good Day!!
San

Wednesday, 16 May 2012

DIY Paper Inserts For iPhone Clear Case


Hello there!! :)
My sister recently got a new iPhone!! So I made these Inserts for her to use with her 'iPhone Clear Case'.
Steps:
1. On a card stock paper, trace an outline for the 'insert' with your iPhone. It would be better if you can use the iPhone case to trace the outline, so that you don't risk any pencil marks on your iPhone.


2. Cut it out.


3. At the top left corner, draw a small rounded rectangle. Cut it out carefully using a craft knife. This will make sure the iPhone's camera isn't covered up by the Paper Insert. This was the most tricky step !!


4.  Paint them and let it dry. I tried a few different colours before I finalized on 'Mint'. Blue + a lit bit of green + lot of white paint = Mint Colour :) It took me too long to get the Mint color right. (Should have Googled it, hah!!)
The ones that look like indigo colour are actually purple, don't know why they look so different in this picture!


5. Tape a piece of lace to the paper . You can use glue too, but transparent tape was a simpler option.


6. Use drops of glue to stick stones and silver sequins on the paper. I cut my silver sequins into smaller squares.


7. Let it dry.


8. Last step, Put it in your iPhone Case!

Have a Good Day!!
San

Related Posts Plugin for WordPress, Blogger...